Welcome back to HubSpot Dev Question blog series! This time we will be focusing on custom quotes. But what actually are quotes? For those of us developers who are not familiar with the word, let me give you a little background about it. In a general sense, a quote is a piece of document that is shared with a customer to show the structure and the pricing of a product or a service. Makes sense, right?
Quotes in HubSpot
In this post, I will be focusing on HubSpot specific quotes, which are an essential part of the sales process, and can be automated with HubSpot. By that I mean, it is only a few clicks away and can be sent to a client with an option to use e-signature, payment with stripe, or print and download, which makes it a powerful tool for businesses.
Out of the box, HubSpot provides 3 templates; Modern, Basic and Original. They come with all the elements you may need to create a quote, and have, for example, different layout and styling. These templates consist of a variety of information that are automatically populated from the associated deals, contacts, companies and products.
So, if it is all automated and easy, why are you writing about it, you may ask? It all comes down to some limitations the HubSpot’s default quotes have, which require a developer's touch. For example, developers can help you in case you want the quote to have additional information that doesn’t show in the default template, such as the logo from the quote recipient's associated company record, unique quote id number, or name of the user that created the quote and so on. The full list of the quote variables can be seen here. In order to customize the templates, however, you need to be using the HubSpot Sales Hub Pro or Enterprise version.
So, this blog provides you with step-by-step introduction to custom quotes in HubSpot. By following these steps and examples you can create your own custom quotes to any business.
Create a child theme to add a new variable to templates
Let’s start by taking a look at the default template’s code. First, go to the marketing tools section in HubSpot, then click “Files and Templates”, choose “Design tools” and finally open “cms-quotes-theme” under the “@hubspot” folder.

In the “cms-quotes-theme” folder, navigate to the “templates” folder. Under the “templates” folder, there are all the default templates and each corresponds with the quote customization page. To add changes to the template, we have to create the child theme of “cms-quotes-theme” since the files are within a HubSpot theme, meaning the theme and its contents can't be edited in the Design Manager. We can create a child theme by selecting one of the templates, and then clicking the “Create child theme” button.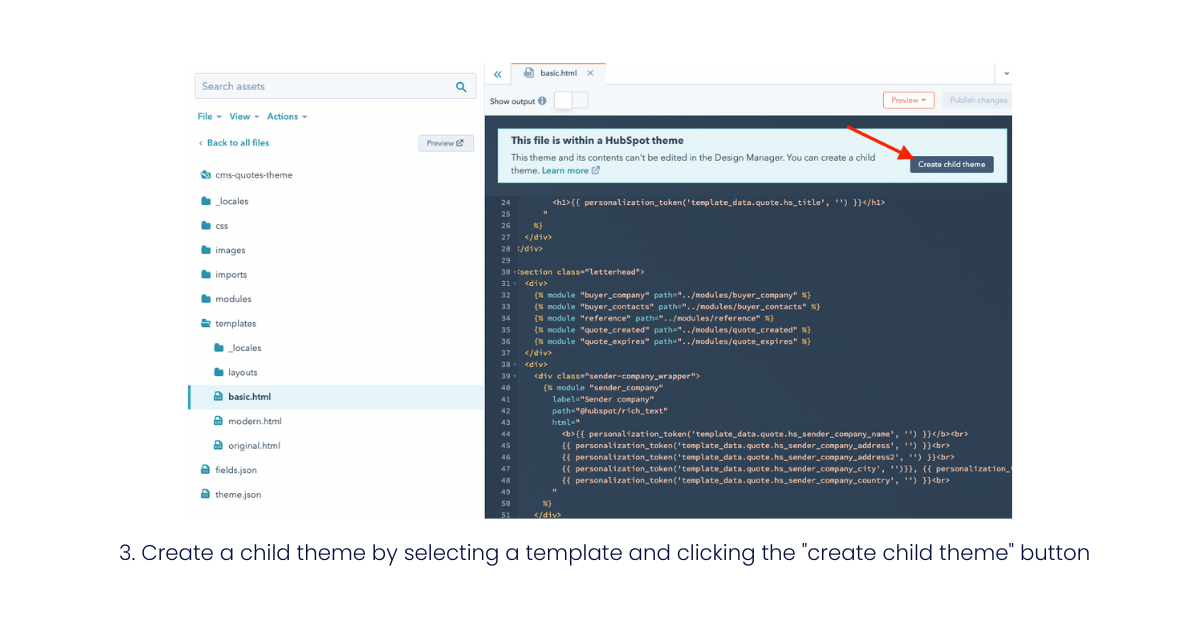
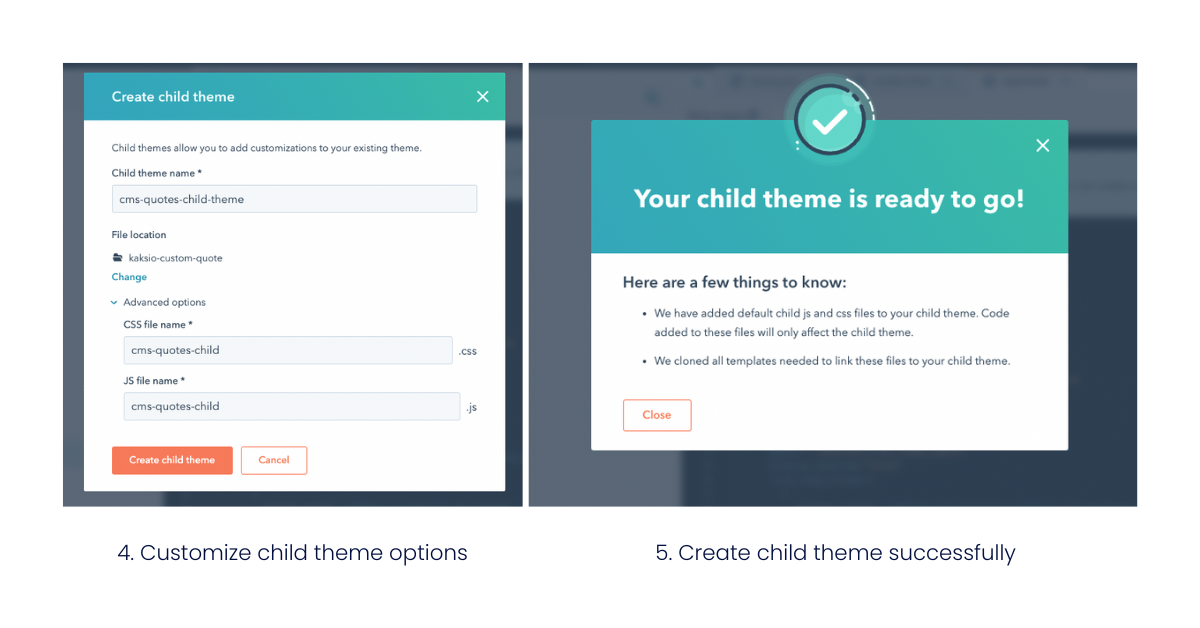
After that, add the name for the child theme in the “Child theme name” input box. You can change the file location in the file location section. CSS file name and JS file name can be edited in the advanced options.
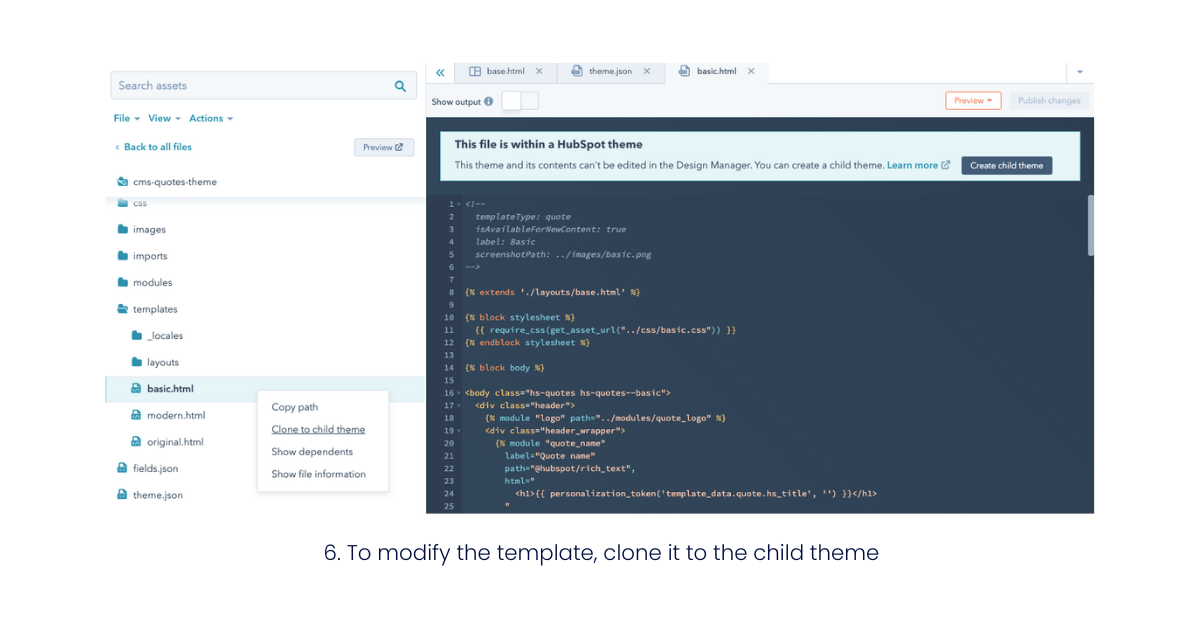
Next, select the template that you want to modify or add a new variable and clone it to the child theme. For example, in case I want to modify the “basic.html” template, I just right-click on the “basic.html” and select “Clone to child theme”.
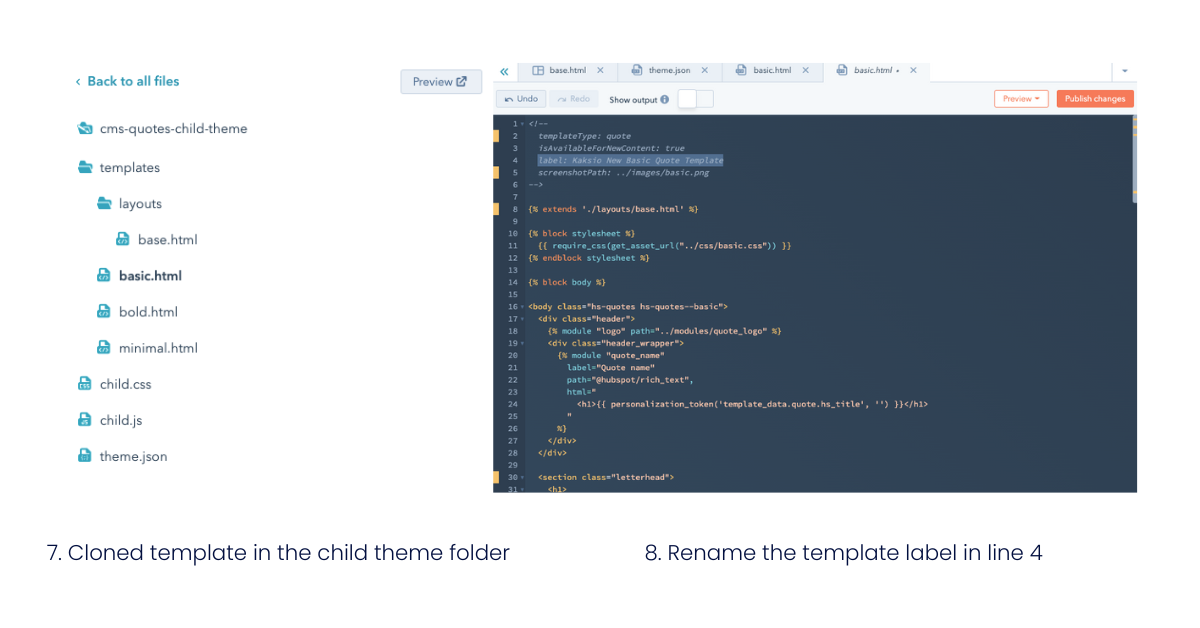
So, from the quote template selection, we can rename the template that we just cloned. We can do it by navigating to “cms-quotes-child-theme” in the file location that you select when creating the child theme, selecting the “basic.html” in the templates folder, and renaming the label in line 4 (Example in Figure 8). Finally, remember to publish the changes.
Preview code template
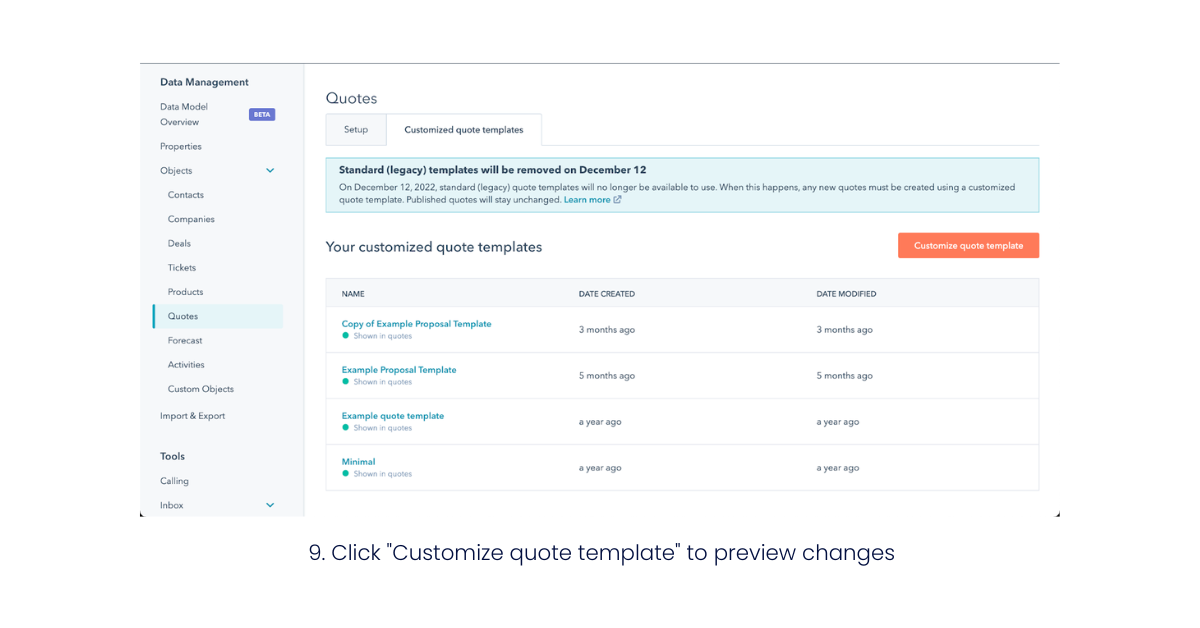
To preview the template that we just cloned and modified, we can go to settings (Settings icon can be found in the navigation bar located in the top right ), then click “Objects” and “Quotes” and finally choose “Customized quote templates” to find our new customizable template. See the images below.

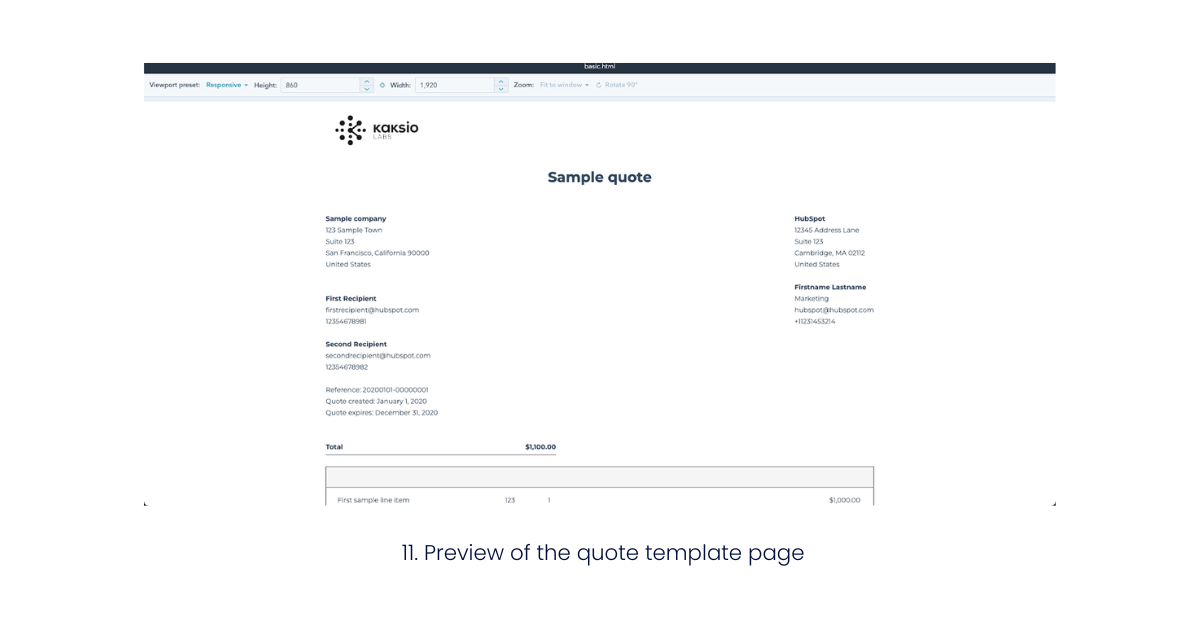
For further development, let’s keep this preview tab open since we will add changes and this preview tab helps us track those changes.
Create a new module and add the module to the template
As we can see from the template, HubSpot prefers adding the variable to the modules first and then adds the module to the template. This makes the document clean and easier to read. 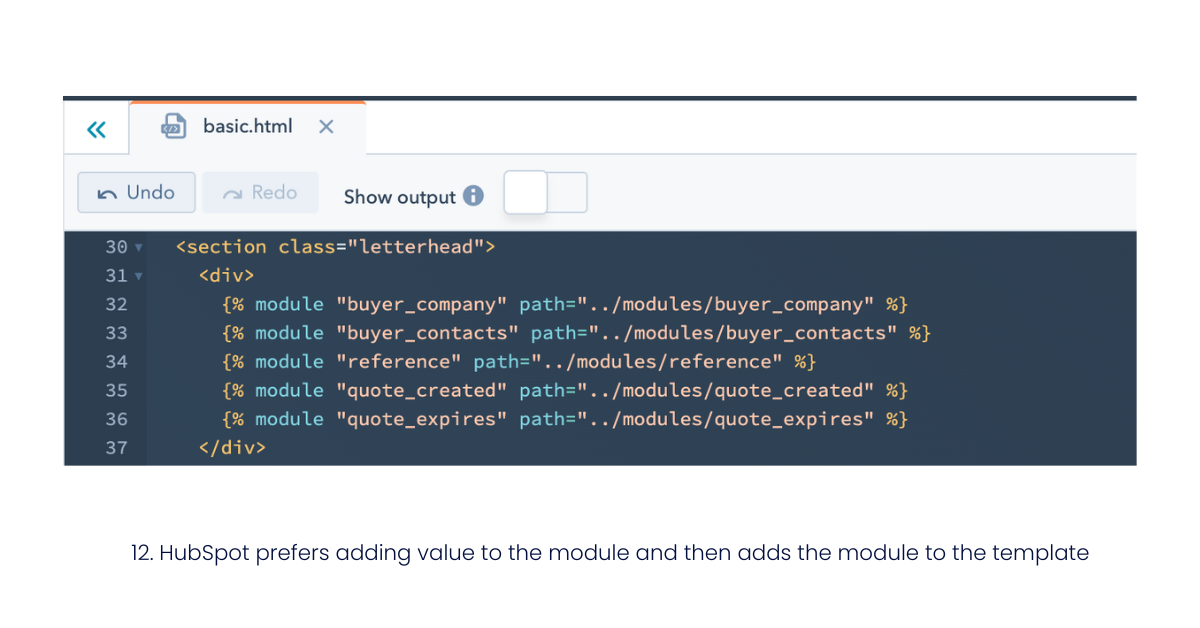 Therefore, we will create a module and then add it to the template to make it consistent. In this example, I will try to add the “Unique quote id number” to the template. First, I create a module folder by going to the “cms-quotes-child-theme”, clicking “File”, and selecting “New folder in cms-quotes-child-theme”.
 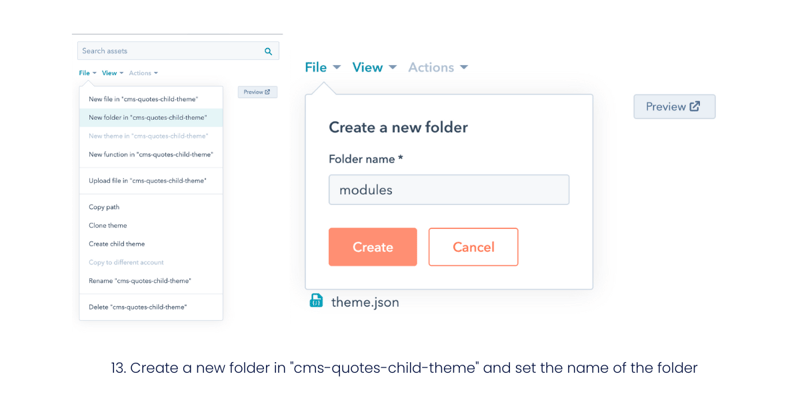 After that, right click on the “modules” folder that we just created, and select “New file in “modules” ”.
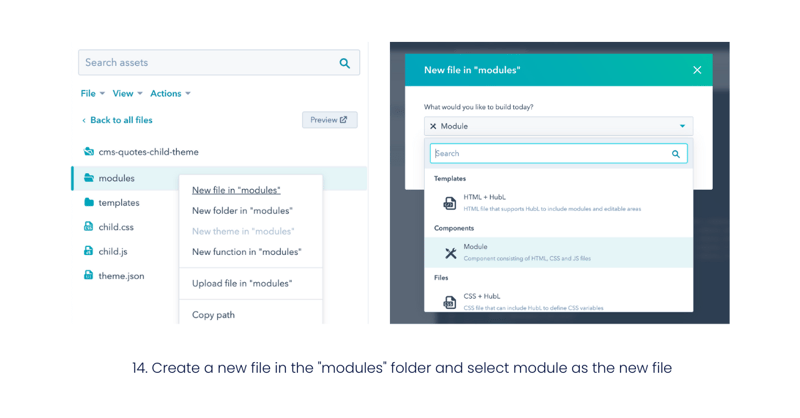 To use the module in the Quote template, we need to check the “Quotes” option in “Where would you like to use this module?”. Then I add the module name in the text field (unique_quote_id) as HubSpot did with their modules. Within the editor, I create a text field in the module where the user can add the text before the Unique Quote ID Number:
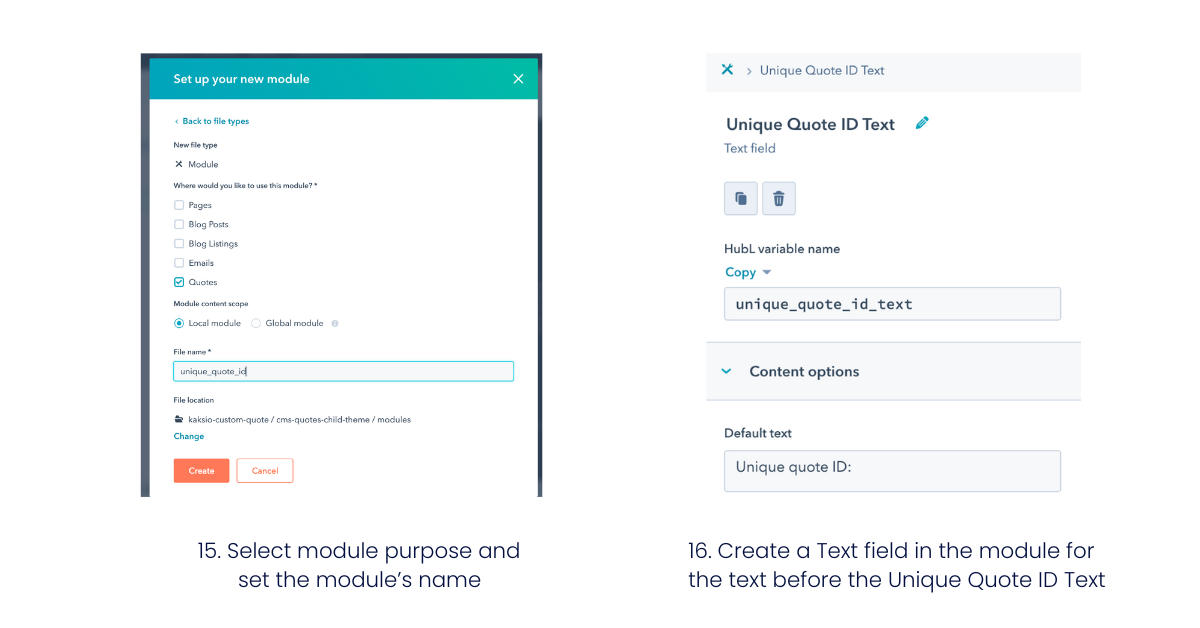
For the HTML, I added this code:
{# Displays the Unique quote ID number #}
{% from '../../imports/mock_data.html' import SAMPLE_TEMPLATE_DATA as mock_data %}
{% set QUOTE = template_data.quote || mock_data.quote %}
{% set UNIQUE_QUOTE_NUMBER = QUOTE.hs_quote_number %}
{{ module.unique_quote_id_text }} {{ UNIQUE_QUOTE_NUMBER }}
The QUOTE variable contains all the quote data which comes from template_data or mock_data, and I set UNIQUE_QUOTE_NUMBER as the Unique quote ID in quote data.
The {{ module.unique_quote_id_text }} will get the input text of the user and display that on the template. Let’s publish the changes. So, we just created a new module to show the unique quote ID number. Now, let’s add the module to the template. To add the module to the quote template, you can scroll down the right panel in the module editor, then copy the snippet in the template usage section.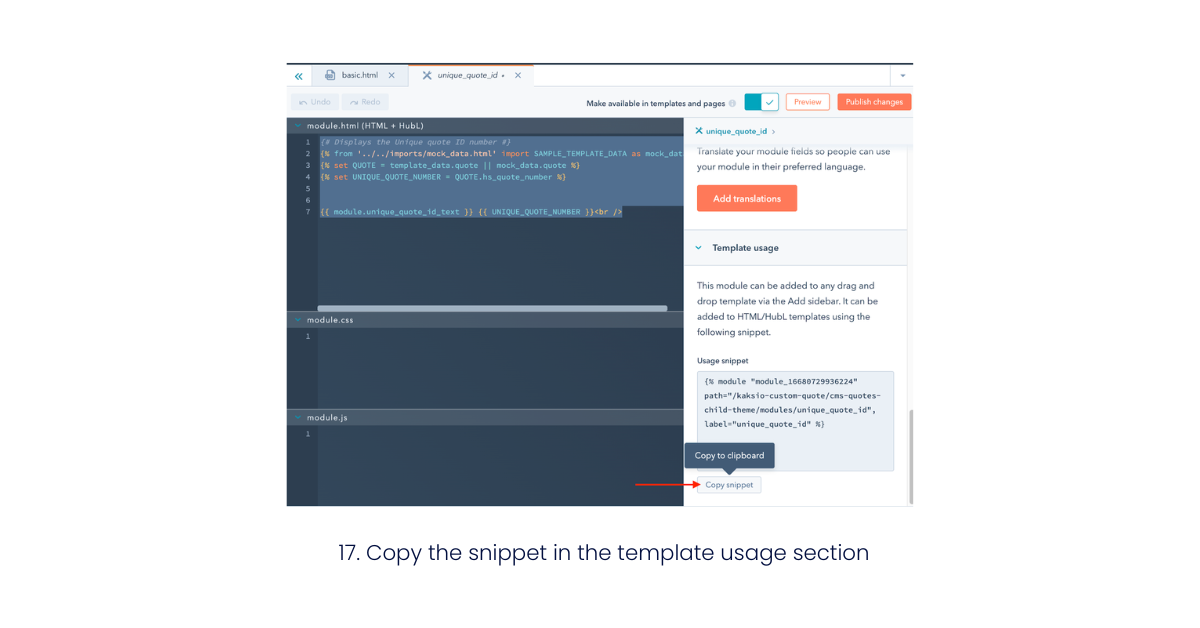 After that, go to the basic.html template, and paste the code you copied in the snippet to line 37, which is below the quote expires module, then publish the changes.
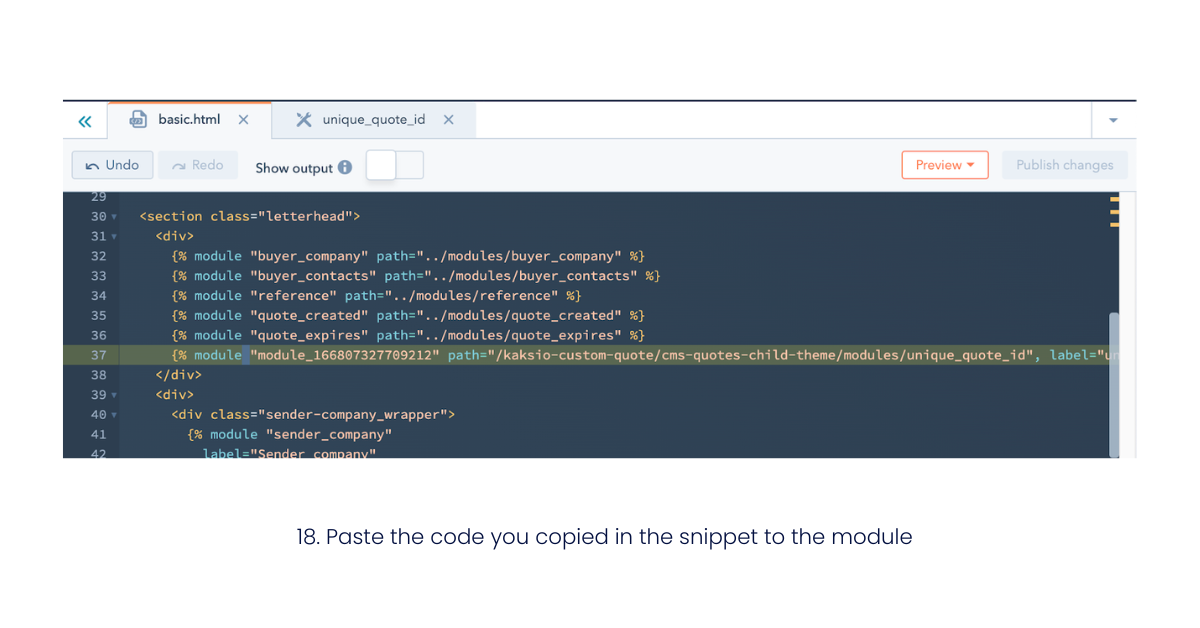 Now, from the template preview, you can see the new changes.
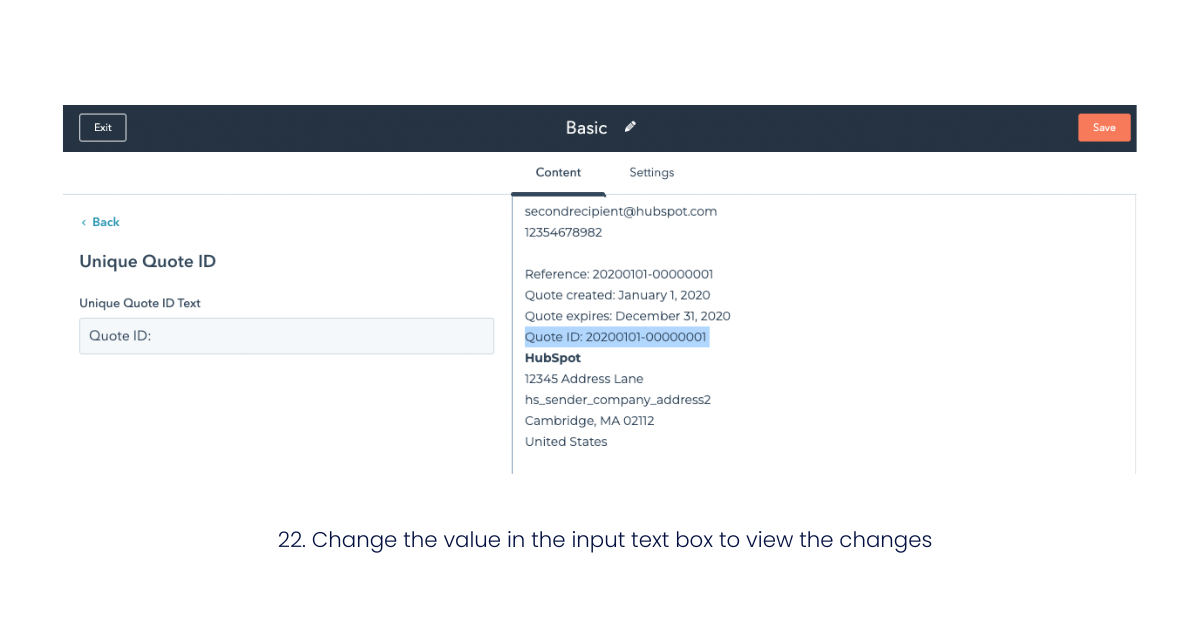
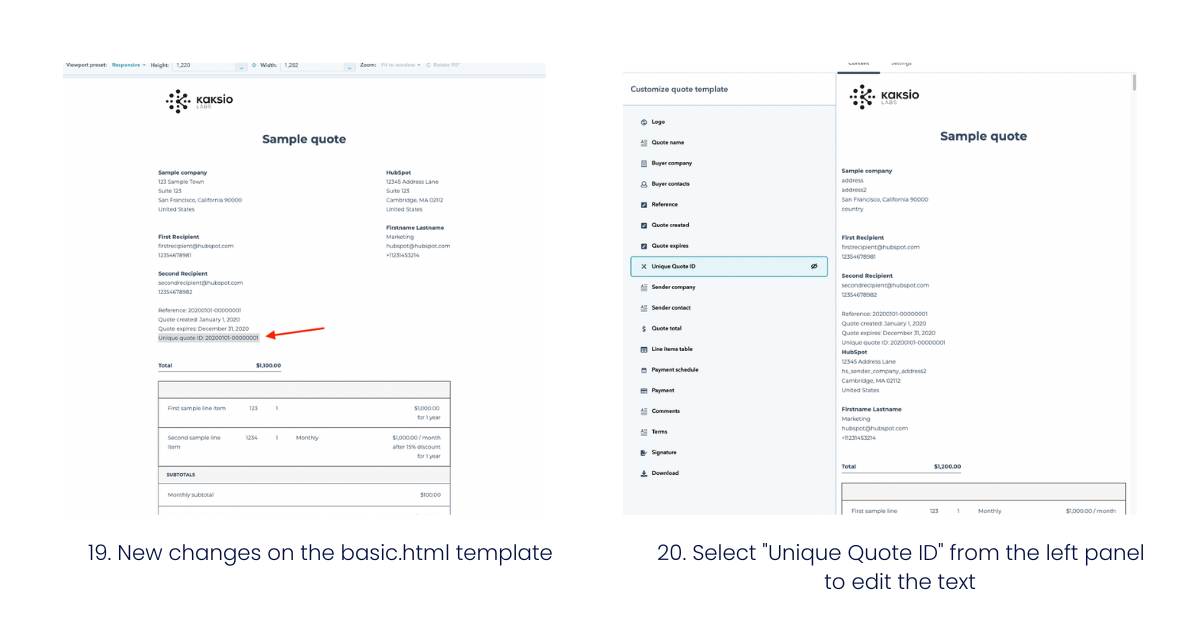 To change the text before the unique quote ID number, go back to the step in Figure 10, but now click the “Choose” button. Select the Unique Quote ID on the left panel, and try to modify the text from “Unique Quote ID” to “Quote ID”, you will see the changes.
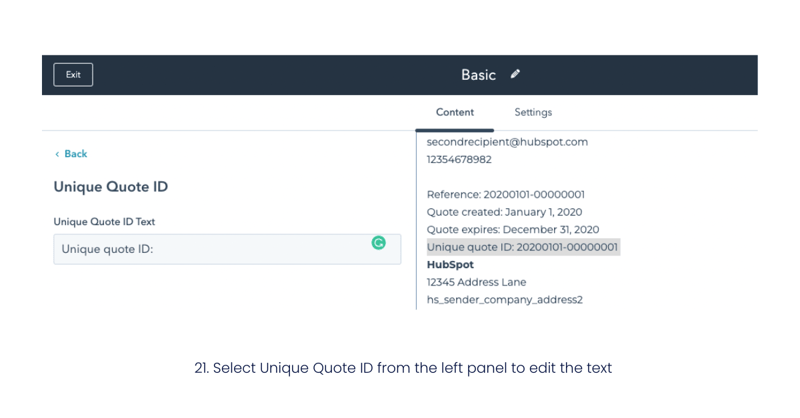
In case you want to see all the variables, you can copy this code to your template and check the variables in the preview tab:
<section>
<p>Showing all variable</p>
{{template_data|pprint}}
</section>
So, in nutshell, this is how we can customize and add HubSpot Quote variables to the quote template. Hope you found this step-by-step introduction helpful and in case you have questions, do not hesitate to contact us here. We’re always here to help in HubSpot development related matters.