The information you collect with forms help you develop a meaningful relationship with your prospects and customers. By providing your audience with relevant content offers, you’ll also get the opportunity to become a thought leader in your industry. Use forms to qualify leads and to determine what kind of content speaks to them.
However, it's crucial to make a fair exchange of information for the offer. It can be tricky to determine how much you want to give away in exchange for contact information. Try to place yourself in their position - what would your expectations be? We all know how frustrating it can be to give precious personal information for barely nothing. We don't want our prospects and customers to feel that way. We want to create meaningful and helpful content in exchange for information.
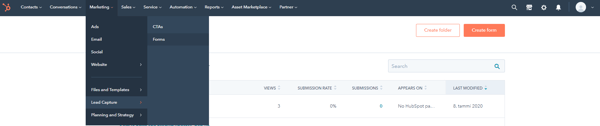
Get started on your journey to great forms by navigating to Marketing > Lead capture > Forms.
There are three types of forms in HubSpot: Regular, Pop-up and Non-HubSpot forms. Regular forms are the most common ones you come across. This is the form type you can edit the most and it'll collect all the information you need.
Pop-up forms dynamically appear with a relevant content offer. These are handy on your blog section, you can set up a pop-up form for subscribing to your newsletter. You can set exact demands for the pop-up, when it should appear for your visitor and where on the screen it will do so. The perk with using pop-up forms is that your site visitor don’t have to leave the page to fill out the form and hence filling out a form won’t interrupt their browsing.
You can use non-HubSpot forms and still collect information to your HubSpot account if you have a tracking code installed on your external page.
In this blog post we'll use a regular form to demonstrate the basics. You start by selecting the type of form you want to create and then choose whether you want use a template or start from scratch.
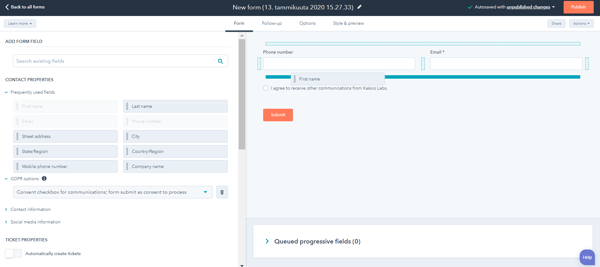
In the Form-tab you create the content of the form. Search for your properties or directly create new ones without leaving the editor. Set up your privacy policy disclaimers and choose whether you want to automatically create a ticket when someone fills out a form.
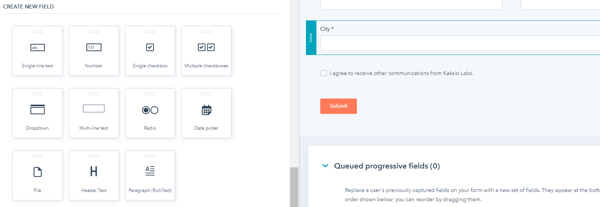
Use the drag-and-drop function to structure your form. There are multiple options for form fields, and you can range style from single-line text to a dropdown select or even a date picker.
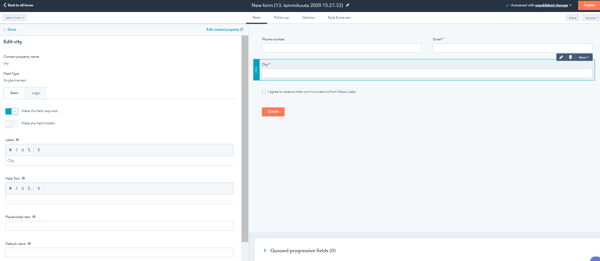
In the Basic-tab you can make fields required or hide them. Make sure to fill out the placeholder and help text so that it matches your brand. Want to use progressive fields? Select a property and swap from the default Basic-tab to the Logic-tab. In the Logic-tab you can determine how your progressive field will function and choose how the information will be displayed for your visitor.
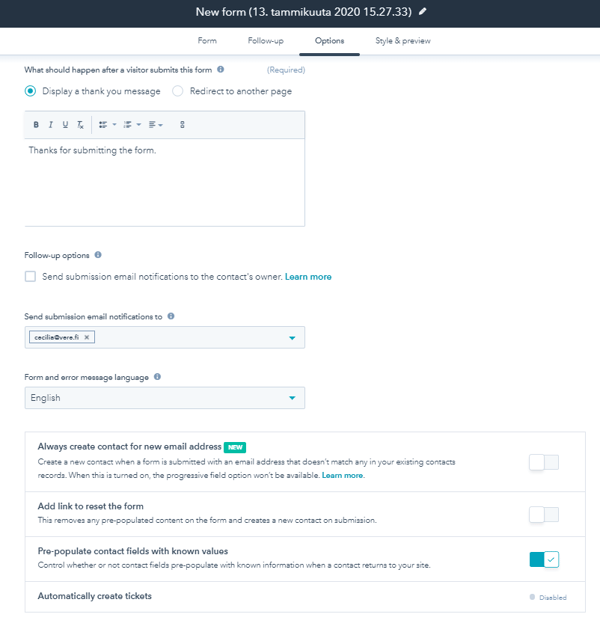
When you are content with your form fields, your next step will be to decide if you want to send a follow-up email. In the Options-tab you determine whether a thank you message is displayed, or the person gets redirected to another page.
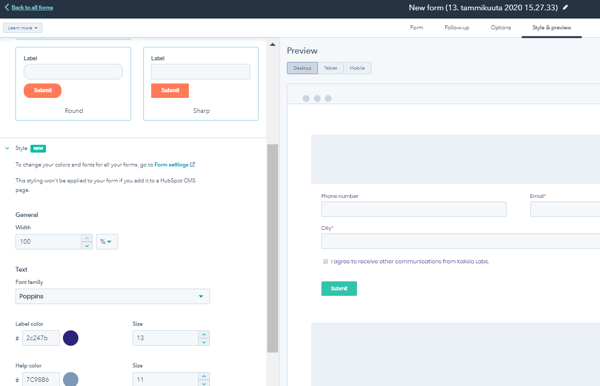
Personalize your form to match your branding! Use the Style & Preview-tab to create a customized form that truly speaks of your brand.
HubHacks is our series on how you can make the most out of your HubSpot account. In this series we focus on the core functions in your HubSpot account. If you are interested in how you can utilize the sales automation functions, make sure you check out the Quick Tips -blog series.